To measure external voltage we will use Arduino analog pins. Arduino analog pins can read voltage from 0 to 5v dc. To measure higher voltage we need voltage divider circuit. So will use resistance as voltage divider. In this tutorial you will learn to make simple voltmeter with Arduino Uno.
Parts Required
- 10kΩ resistance
- 100kΩ resistance
- Arduino UNO
- Jumper wires
- Breadboard
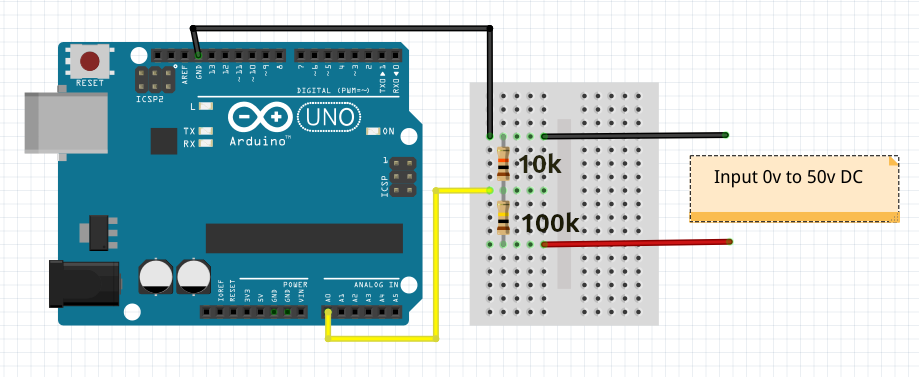
Circuit Diagram
Arduino Code
int R1=10; //Resistance 10K
int R2=100; //Resistance 100K

void setup()
{
  pinMode(A0, INPUT);
  Serial.begin(9600);
}

void loop()
{
  int a = analogRead(A0); //Read A0 pin value
  float vA0=a*(5.00/1023.00); //voltage across R1
  float v = vA0*(R1+R2)/R1; //Voltage across R1+R2 (Input voltage)
  Serial.println(v,2); //Print to serial
  delay(500);
}
Working
In this circuit we are using 2 resistance (R1=10K, R2=100K). These resistance are dividing voltage in 1:10, means voltage across R1 in 11 times lower than input voltage. So if we read voltage across R1 via analog pin A0 and multiply it with 11 we will get external voltage.
With above circuit we can measure voltage upto 55v dc. To increase the voltage limit of this circuit you have to increase the resistance ratio.